Getting your college set up
You can set the platform up yourself, in a browser, without talking to us and without asking IT for anything. It takes about twenty minutes to go from nothing to a class looking at their first exercise.
Open the college
Sign up with your work address. You will be asked for the college’s name and roughly how many people will use it, which sets nothing in stone and is only so we know what to expect.
Use an address at the college’s own domain. A personal mailbox such as Gmail, or a temporary one from a throwaway-mail service, is refused, because the address is what says a college asked.
The account you sign up with runs the college: it can add staff, add students, and see everything in it.
Your college opens with three sample modules. The first, Java (Sample), lets you see what a class would meet before writing anything: a program that prints the first ten primes with a test that checks it, a flowchart of how it finds them, a five-question quiz on Java objects, a crossword of Java terms, and a lab, already published, where each student gets a database and a web API to work with from a terminal. It is yours like any other module, given to nobody until you hand it out, and you can change it, copy from it or delete it.
The second, Database (Sample), holds one lab, already published: each student gets MySQL with a small online shop’s data in it, eight tables of customers, products, orders and reviews, and phpMyAdmin to look at it in a browser. Its words walk through both and end with ten SQL exercises, from a first SELECT to joins, GROUP BY and subqueries. It also holds SQL Basics, a lesson worked in that lab: each step is explained and has a Run button that types a SQL command into the student’s terminal, from adding a new table to inserting, selecting, joining, updating and deleting rows. SQL Basics 2 follows it in the same lab, with counting, grouping and finding what is missing.
The third, Basics (Sample), holds Git Basics, a lesson worked in a lab: each student gets their own Gitea, a Git server with a web page, and a terminal. The lesson has them make a repository in Gitea, then a folder, a file and a first commit, and push it, each command explained and with a Run button that types it into their terminal. Git Basics 2 follows it in the same lab, with a branch and a pull request.
The fourth, Lab Basics (Sample), holds four more labs, each with two short lessons worked in it: API Basics and API Basics 2, on a database with a web API, and Juice Shop, DVWA and WebGoat Basics and Basics 2, on the three web security labs. The fifth, Networking Basics (Sample), holds the three networking labs, each an Ubuntu VM with a small network inside it, and a lesson worked in each: Static Routing Basics, OSPF Basics and BGP Basics. They look around the network and find where a packet stops, and leave making it work to the lab’s own task. Three more modules hold the labs added since, Security Labs (Sample), DevOps Labs (Sample) and Linux Labs (Sample), each lab with a short lesson of its own. Somebody on a free personal account is given every basic lesson, on a module called Basics, and finds them on Home, where a big Library button lists more lessons to add to their own. Each lab’s page in this manual says where to find its lessons.
The Java module also holds a sample lesson, Java OOP basics (Sample), which is there to show what a lesson can hold rather than to teach Java: text, callouts, two pieces of code the class can run, a diagram, a video and a quick quiz. Open it in the lesson builder to see how each block is made.
Signing up lands you on Home, which lists the lessons and tasks that changed most recently, with a Create a course button at the top and a note pointing at it until your college has a course of its own. Making a course takes you into it, and its page has Create a module, which takes you into the new module on its Lessons tab, ready to build a lesson or import one from a document you already teach from. Practice has a sample program and a diagram of it waiting for you too.
- Go to sign up. Press Start free on the bar, or Create a free account under the sign-in card, and choose the option for a school or college rather than an individual account.
- Prove your address. We email a six-character code. There is no password to invent.
- Name the college. The name your students will see, and an address for the record.
Add your staff
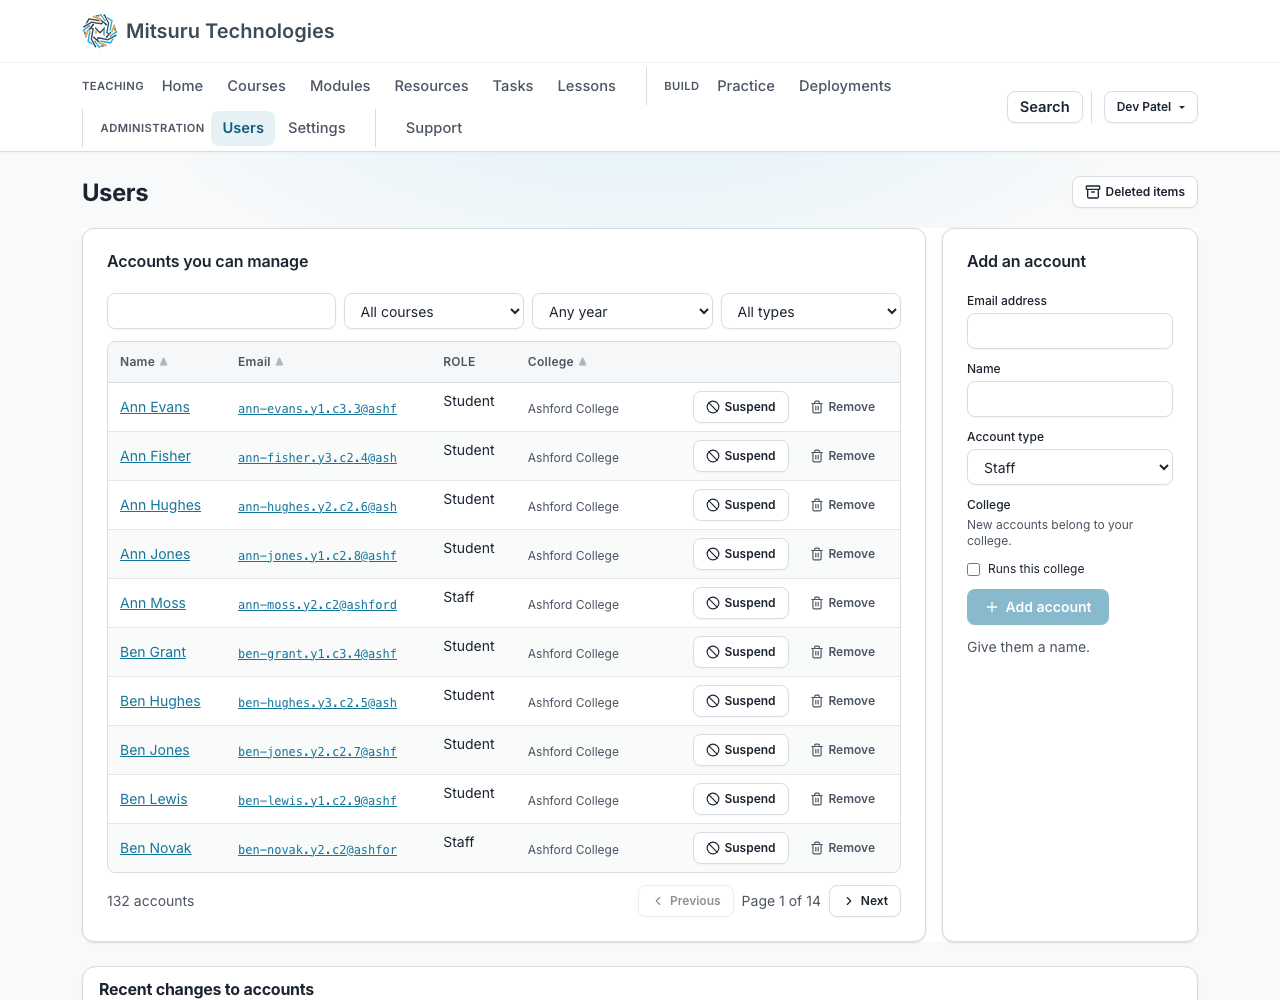
Add the other teachers from the accounts page. A teacher can make modules, set work and mark it; a college administrator can also add people and change the sign-in settings.
To make one of them a college administrator too, open Settings and its People tab: it shows who runs the college, and everybody at it underneath with a button beside each member of staff. Only staff can run a college, and you cannot stand yourself down, so somebody is always left holding it.
Nobody has to invent a password. Signing in is a code emailed to the address, and a passkey afterwards if they want one.
Get the students in
Two ways, and most colleges use both. You can add students one at a time or in a batch, which is right for a class list you already have. Or you can send a join link, which lets a class add themselves in the first five minutes of a lesson.
Questions people ask
- Where do I start after signing in?
- On Home. It opens on what needs you, most urgent first, then lists your modules, or your courses once you are on more than ten, beside the lessons and tasks that changed most recently in them, so you can pick up where you left off. Lessons come first, up to fifty, then tasks, up to a hundred, ten to a page, and a student sees only the tasks set for them. Until your college has a course of its own, the college admin sees a highlighted “Start here: create your first course” note beside the Create a course button. Everything you can reach is on the bar across the top, grouped: Teaching for the work, Build for your own files, apps, containers and VMs, a big button each, and Administration for running the college. Your own name at the end opens your profile and the way out, and the globe beside it changes the language. Your time zone is on your profile, under Language and time zone.
- Do we need IT to approve anything first?
- No. There is nothing to install and no network change: it is a website your students already have access to.
- Can students sign in with their school Google account?
- Yes, if you turn that on for your college. Otherwise signing in is a code emailed to their address.
- What if we want to try it with one class first?
- That is the usual way, and the first year is free: up to 50 students, with staff not counted. After that it is one yearly price for the first 50, three or four classes, and nothing is charged until you decide.